UIPicker inside a UIAlertController
- Nov 22, 2016
- 3 min read
What we are going to do in this tutorial:
*** Swift 3 && XCODE 8.1
* Create a new Xcode project
* Put a button on the screen that presents an UIAlertController
* Put a textfield in that Alert
* Assign a UIPicker as the input for the textfield
* Put the text from the UIPicker into the textfield
We will begin with creating a new Xcode project: Single View Application.
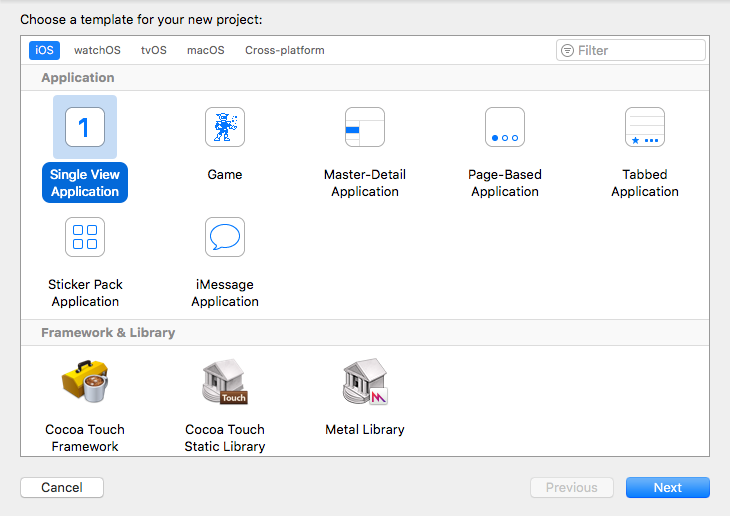
Name it what you would like. Make sure you specify "Swift" as the language. I am also going to make this "Universal" for the devices selection. Other than that, just click "Next" and save it to a location of your choice on your computer.
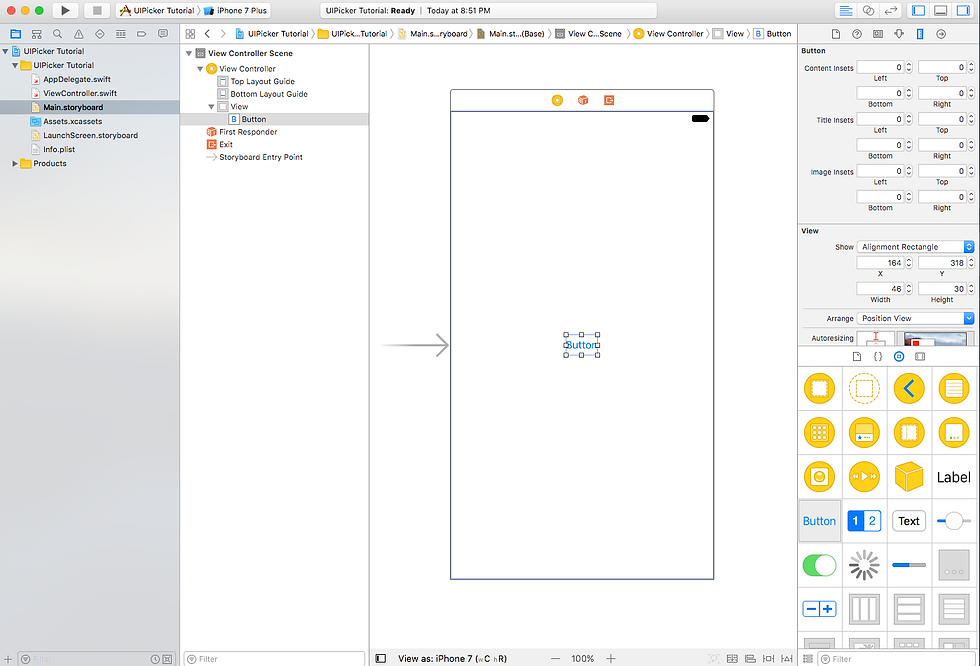
From the "Object Library" in the right pane at the bottom of the window, grab a UIButton and place it in the center of the storyboard.
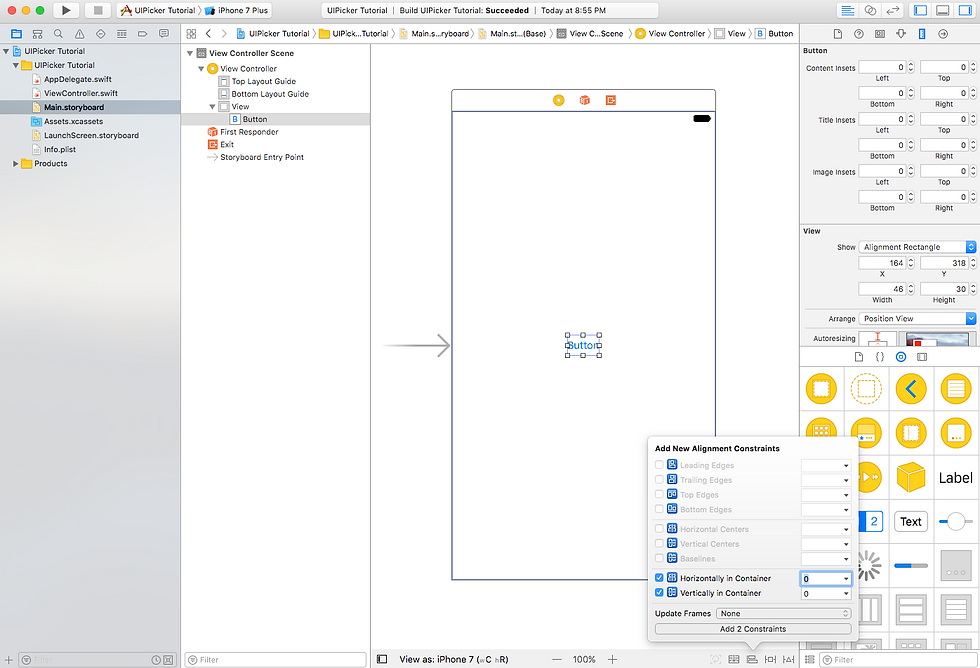
From the "Align" menu from the bottom of the screen on the right towards the "Object Library", select the "Horizontally in Container" and "Vertically in Container" buttons. This will center your button in the middle of the view.
While holding the two buttons: "Command" and "Option", press "Enter" to open up the Assistant Editor. The ViewController.swift file should appear. While holding the "Control" key, click and drag from the button on the storyboard to the ViewController. A window should present itself and ask you what kind of link to code you are wanting to make.
Make sure of the following:
Connection is set to "Action" - This means we want code to run when the button is pressed.
Name the connection "alertButtonPressed" - A good naming convention is "lower camel case" (first letters of words are caps except first word, no spaces).
Type is "UIButton",
Event is "Touch Up Inside" - This specifies that you only want the code to run when the user's finger presses the button and without dragging their finger, they pick up their finger.
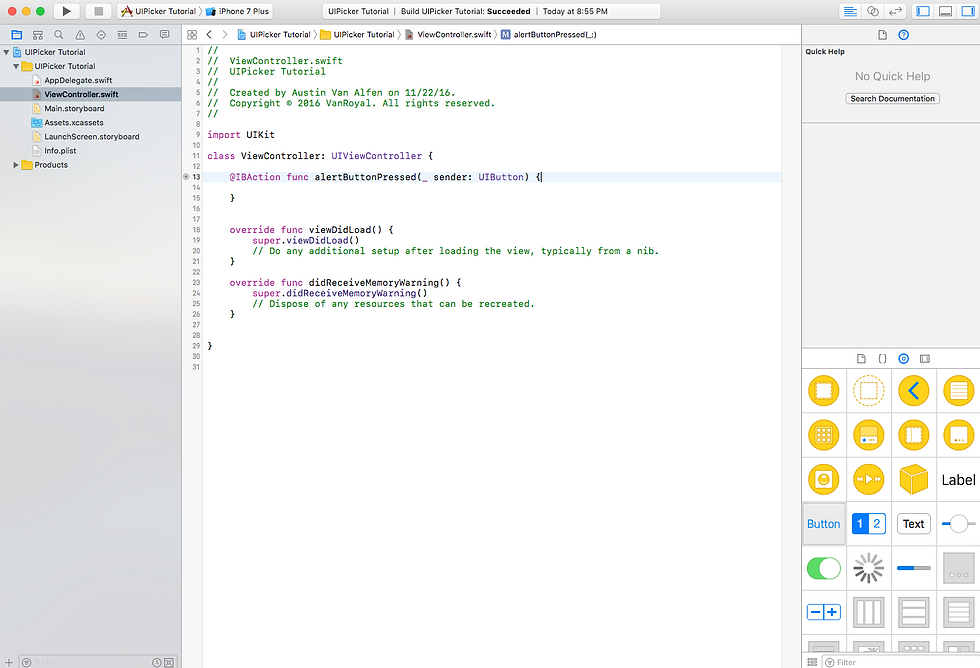
Click "Connect" and you should see a segment of code appear in the ViewController.
Close the Assistant Editor in the same way and click on the ViewController.swift file in the project navigator from the left pane of Xcode.
You should have a screen like this:
Now we will depart from our IBAction function and come back to it in a little bit. We need to create a UIPickerView. There are 3 things we need to do to start.
1. Declare it
2. Conform to the Delegate and DataSource protocols which state what choices we need to show in the picker and where to put the text after the user selects a choice.
3. Setup the choices we want the user to select.
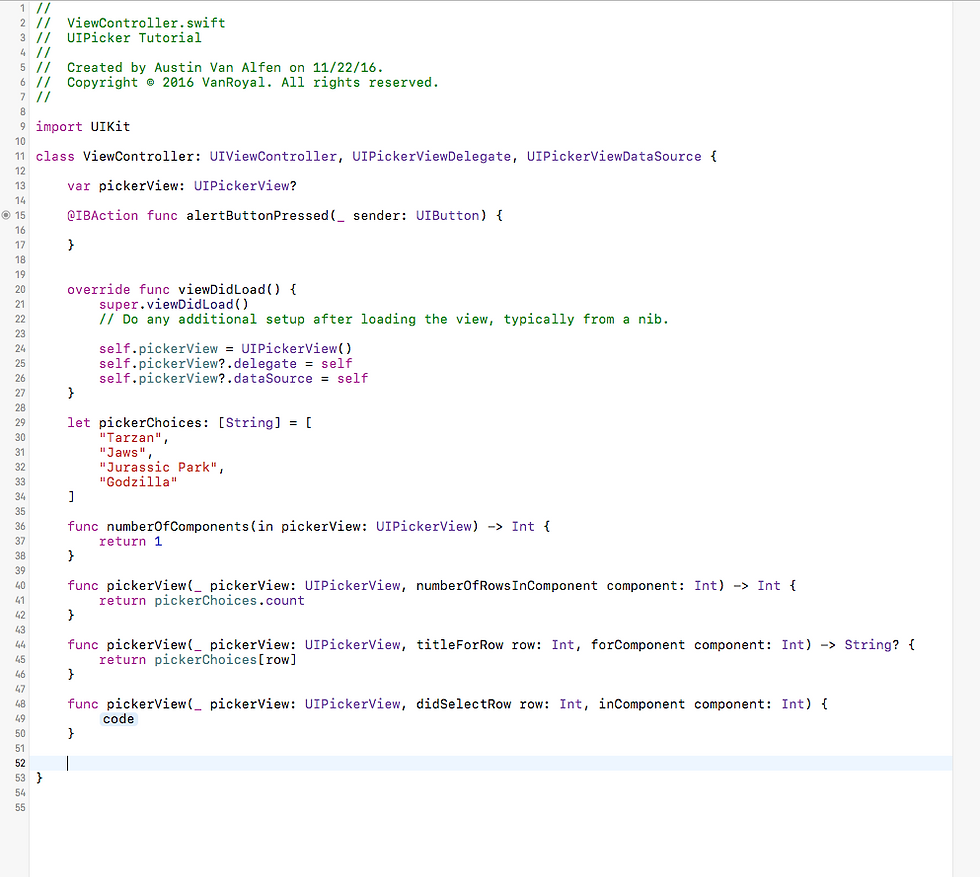
Step 1 and 2 are shown here:
Note: Where we declared the ViewController class, after the colon, this is where we conform to the protocols like so.

Note: I deleted the "didReceiveMemoryWarning" function, we will not use it in this tutorial.
We now need to decide what we want to display in the picker. In the next picture we created an array of strings and updated some of the pickerView functions which tell the pickerView what to show and how.
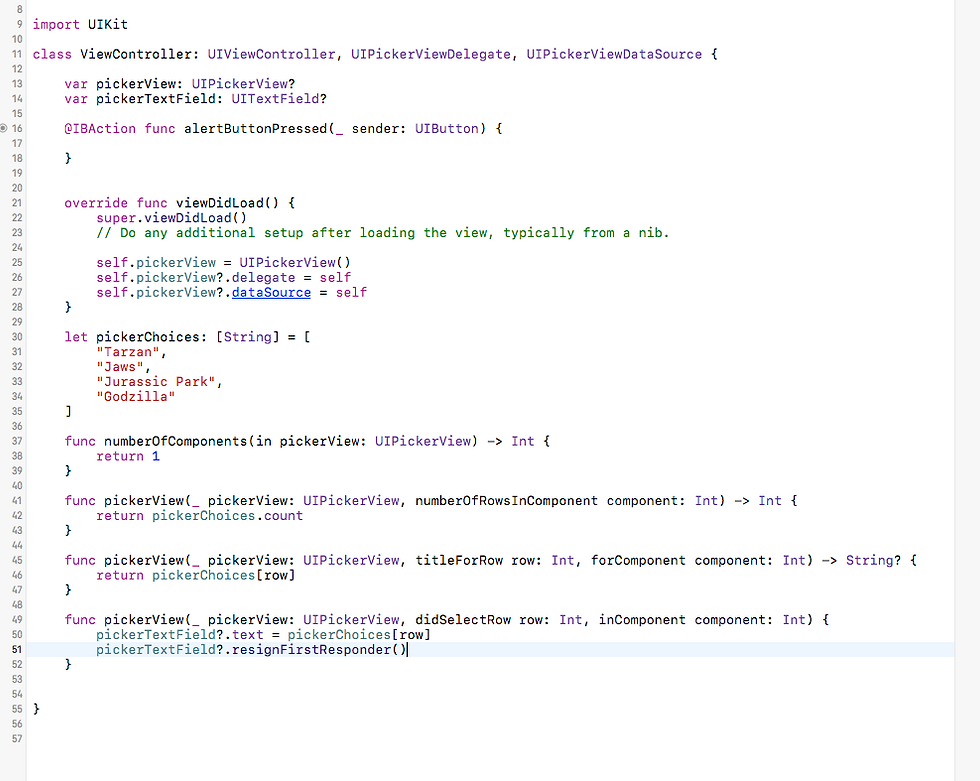
For that last delegate function, we need to tell the picker what to do when the user picks a row. We need to create a UITextField at the top of our project, and when the user selects a row, we want the textfield to be filled with the text that is on that row in the picker. We do this by setting the textfield's text property to the selected row's value, which is one of the choices in the pickerChoices array. We also want the picker to go away when a choice is made, we do this by resigning the first responder of the textfield when a row is selected.
Now we will finally turn back to the IBAction function that we made at the beginning. This is where we are going to construct the alert we want to present and incorporate everything we have done. To do this we need to:
1. Create a UIAlertController
2. Add a UITextField to the UIAlertController
3. Add a UIAlertAction to the UIAlertController
4. Present the view to the user.
We do that in the next picture:
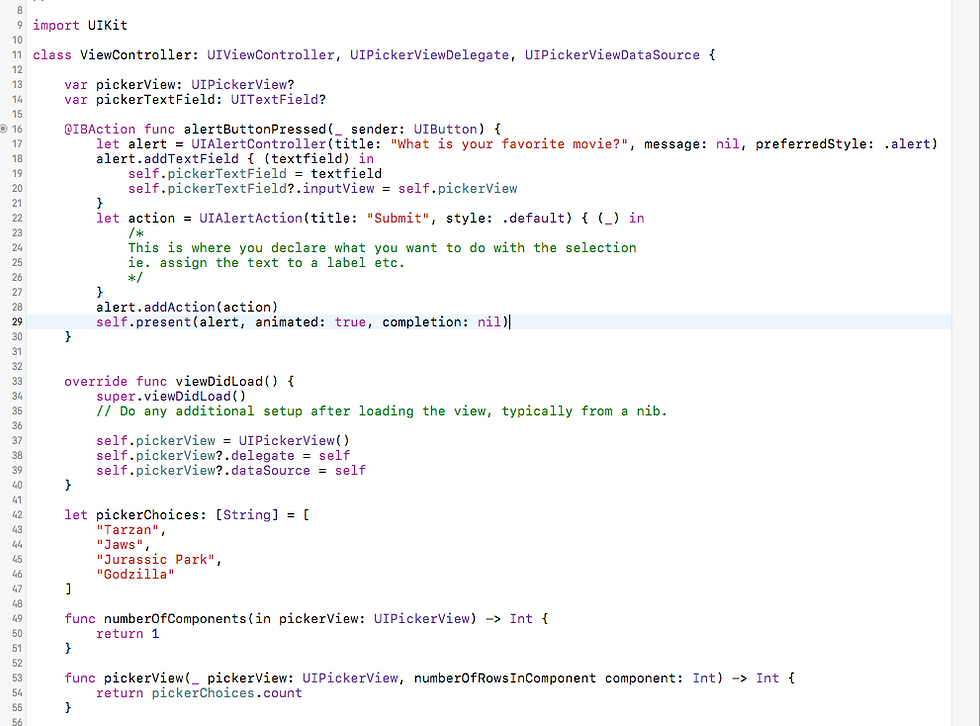
Now you should be able to run your app from the play button at the top right and in the simulator, when you press the button, an alert will pop up and when you press on the textfield, you should get a picker instead of a keyboard. As I stated in my code example, in your action for your alert, that is where you would assign that text from your picker to a label or pass that information to another destination.
Comments